What Is Pigeon Pose in Yoga?
Pigeon Pose is one of yoga’s most recognizable and deeply therapeutic postures, offering an intense stretch through the hips, glutes, and hip flexors that few other poses can match. Whether you’ve spotted it in a studio class or scrolled past it on social media, this pose has a reputation — and it’s well earned.
The Anatomy of the Pose
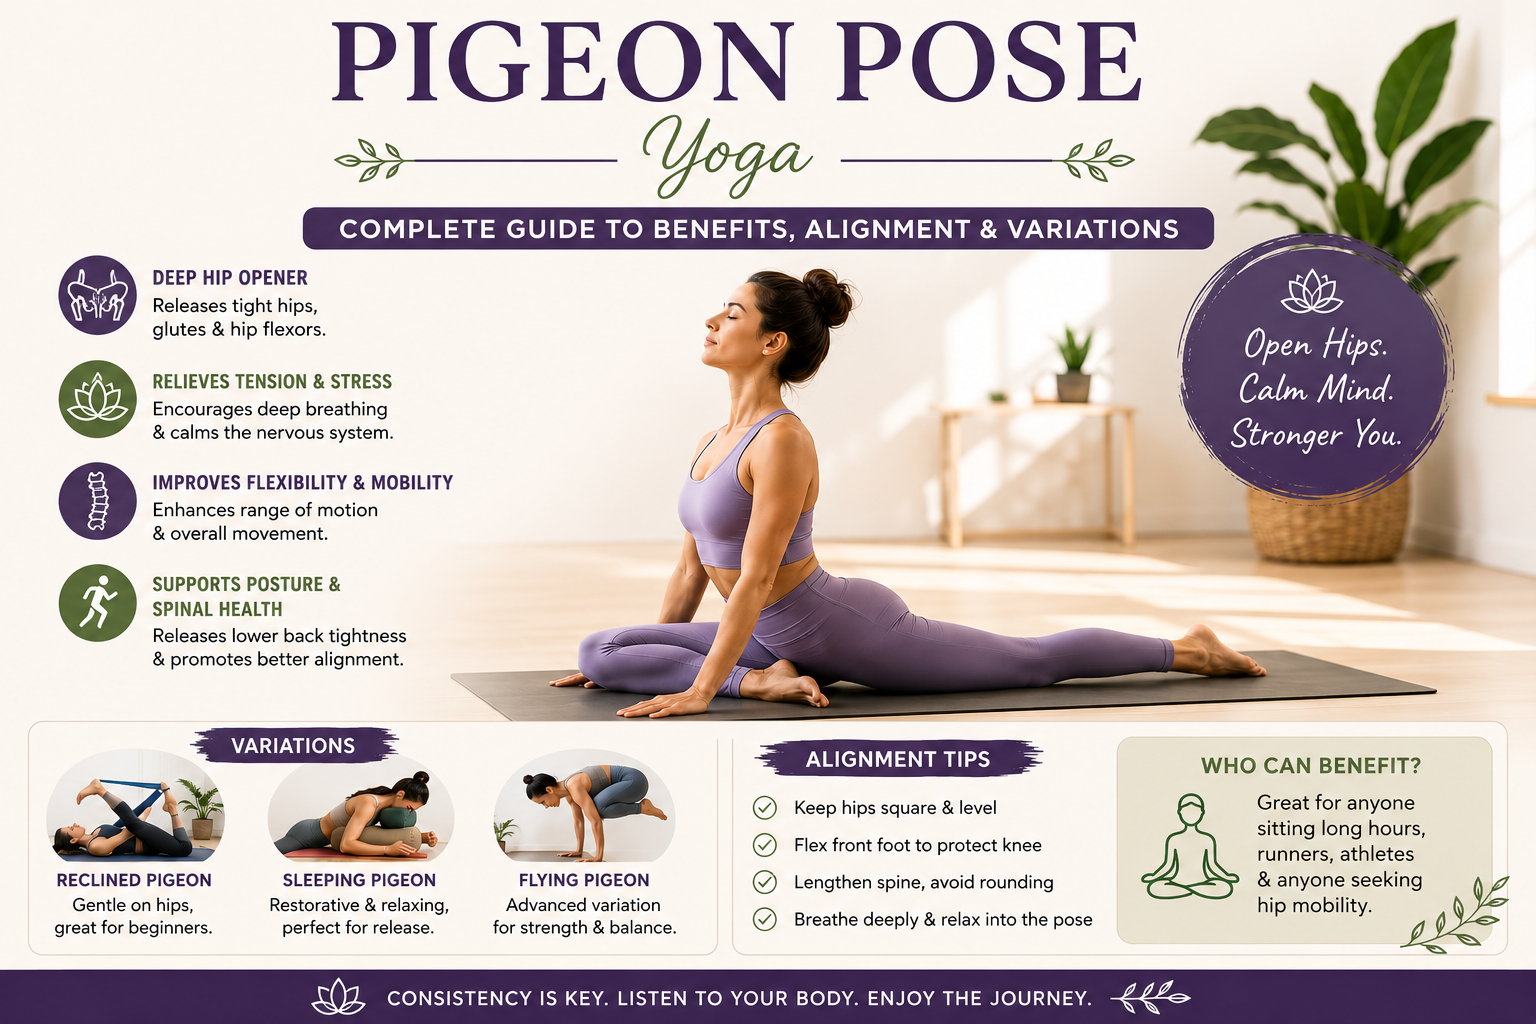
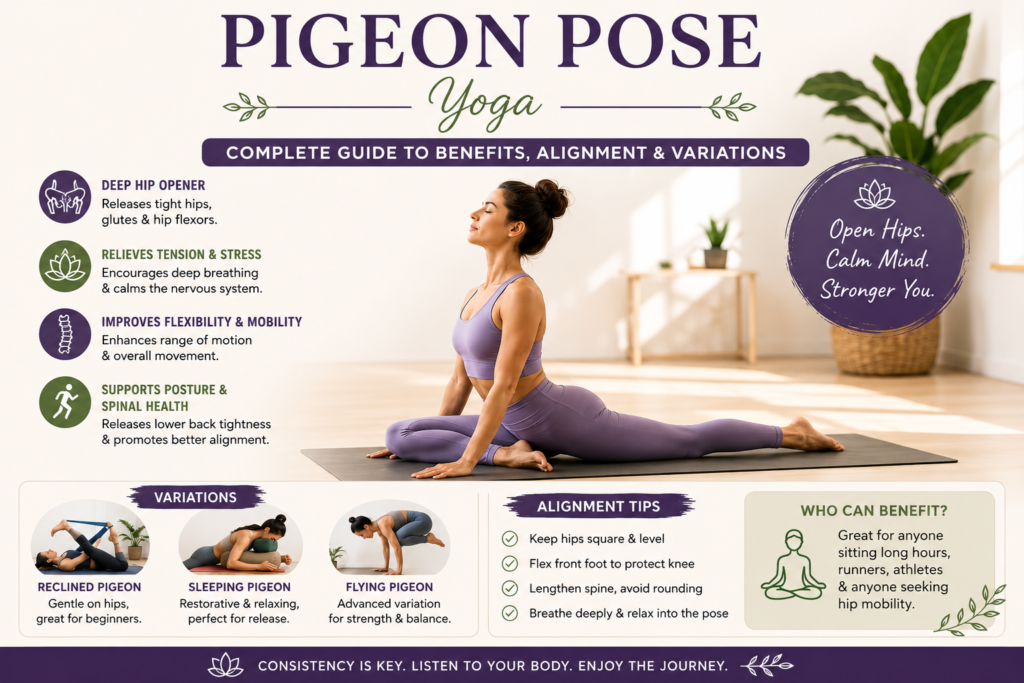
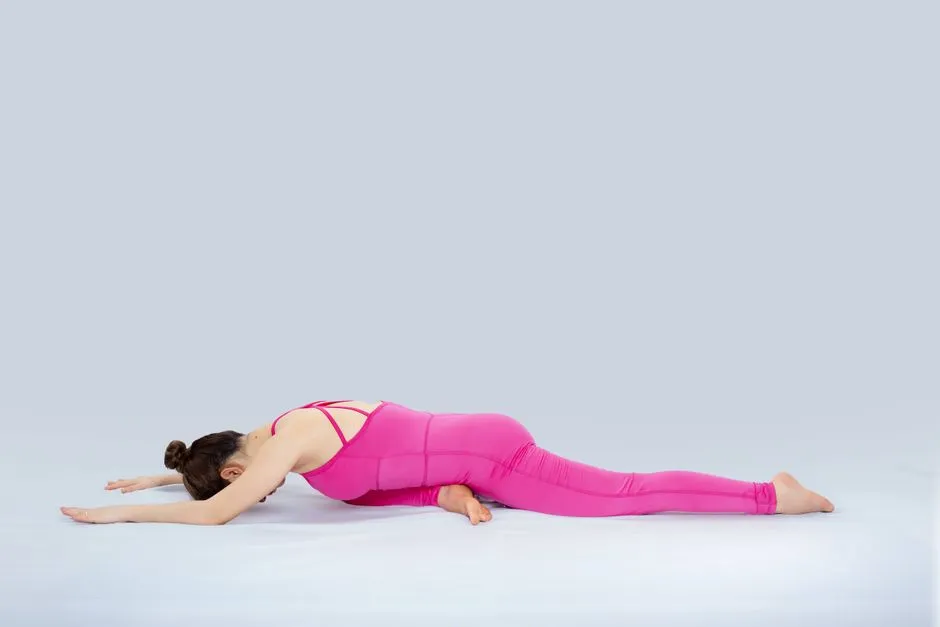
In its classic form, Pigeon Pose brings one leg forward with the shin angled across the mat while the opposite leg extends straight behind. This position simultaneously opens the external rotators of the front hip and stretches the hip flexors of the back leg. Healthline on hip flexibility and yoga benefits Healthline notes that consistent hip-opening work can meaningfully improve range of motion and reduce chronic tightness linked to sedentary lifestyles. If you experience radiating discomfort during the pose, see our guide on yoga for sciatica: 6 safe poses to relieve nerve pain.
Why It’s Called Pigeon Pose
The name comes from the Sanskrit Kapotasana, where kapota means pigeon or dove. When the chest lifts and the back arches in the full expression of the pose, the shape of the body — with the chest puffed forward — mirrors the proud, rounded breast of a pigeon. It’s a vivid image that makes the name immediately unforgettable.
How to Do Pigeon Pose: Step-by-Step Instructions
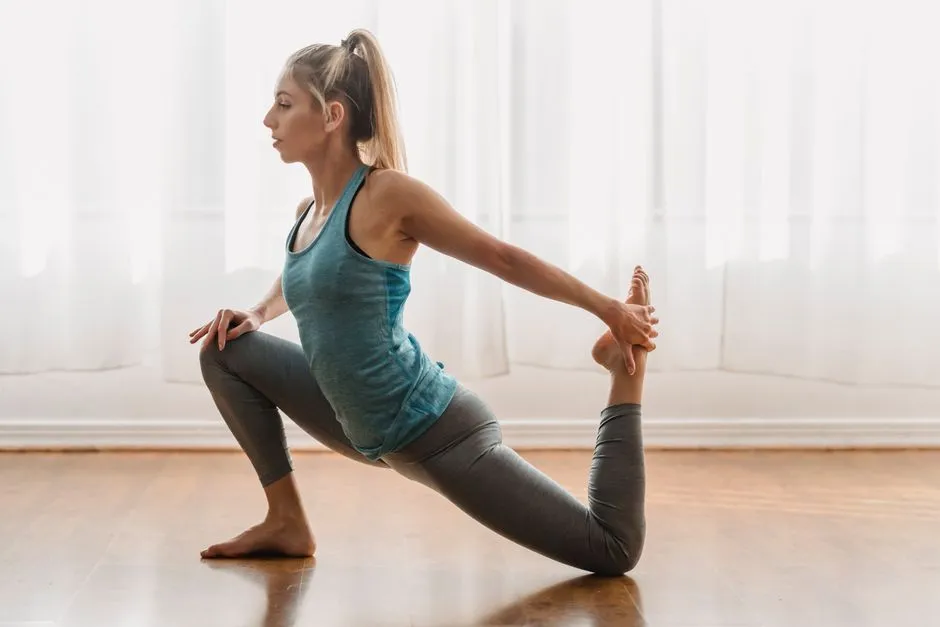
Begin in a tabletop position on all fours. Slide your right knee forward toward your right wrist, angling your shin diagonally across the mat. Extend your left leg straight back, keeping the top of your foot flat on the floor. Lower your hips evenly toward the mat — use a folded blanket or block under your right hip if one side lifts. Walk your hands forward and lower your torso over your front leg, resting on your forearms or extending your arms fully overhead.
Proper Alignment Cues
- Square your hips as much as possible toward the front of the mat — uneven hips place excess strain on the sacroiliac joint.
- Flex your front foot slightly to protect the knee from lateral stress.
- Keep your back leg neutral, not rotating outward at the hip.
- Avoid collapsing onto the outer hip of the front leg.
The Mayo Clinic on yoga safety and injury prevention WebMD emphasizes that misalignment in hip-opening poses is a leading cause of knee and lower-back injury — so prioritize form over depth. If you experience sharp pain in the knee or lower back, come out of the pose immediately. Pigeon pose is particularly valued for sciatic nerve tension; for related guidance, see our article on yoga for sciatica.
Breathing Throughout the Pose
Use each exhale to soften deeper into the stretch rather than forcing your body down. Inhale to lengthen your spine; exhale to release muscular holding. Slow, diaphragmatic breathing signals your nervous system to relax, making the hip flexors more receptive to the stretch.
Duration and Hold Time
Hold pigeon pose for 60 seconds to 3 minutes per side. Beginners should start at 60 seconds and gradually extend the hold as flexibility improves. Repeat on the left side before moving on.
Why Does Pigeon Pose Feel So Good? The Science Behind the Sensation
The Physiological Release Explained
The hips are home to some of the body’s largest and most chronically tight muscle groups — the piriformis, iliopsoas, and glute complex. When you hold pigeon pose, sustained compression and lengthening trigger the nervous system to gradually release muscular guarding. This process, called autogenic inhibition, signals the muscle spindles to stop contracting, producing that deep, melting sensation practitioners often describe.
Fascia and Connective Tissue
Beyond muscle, pigeon pose works into the dense fascial web surrounding the hip joint. Fascia responds slowly — it needs sustained, moderate pressure held over time, not aggressive force. This is why the pose rewards patience. Regular practice can meaningfully improve connective tissue pliability, reducing stiffness that contributes to lower back and sciatic discomfort. For those dealing with nerve-related hip pain, see our guide on yoga for sciatica.
The Mind-Body Connection
Many practitioners report unexpected emotional responses in pigeon pose — tears, anxiety, or sudden calm. While anecdotal, this aligns with research suggesting the hips may store residual tension from chronic stress responses. The NIH NCCIH on yoga for stress reduction and mental health NIH NCCIH acknowledges yoga’s measurable impact on the autonomic nervous system. Slow, diaphragmatic breathing in the pose activates the parasympathetic system, shifting the body from fight-or-flight toward genuine rest.
The Comprehensive Benefits of Pigeon Pose
Hip Flexibility and Mobility
Pigeon pose yoga is renowned for its ability to deeply open the hips. This involves stretching the hip flexors of the back leg and the external rotators of the front leg, such as the piriformis. Regular practice can significantly improve range of motion, which is crucial for everyday activities and preventing injuries. This deep hip opening can also be beneficial for those experiencing discomfort related to sciatica, as detailed in our guide on yoga for sciatica.
Stress Relief and Mental Clarity
Beyond the physical, pigeon pose yoga is a powerful tool for emotional release. Holding the pose encourages deep, diaphragmatic breathing, which activates the parasympathetic nervous system, promoting relaxation and reducing cortisol levels Mayo Clinic. This stillness allows the mind to quiet down, fostering a sense of calm and improving focus.
Improved Posture and Spinal Health
By releasing tension in the hips and lower back, pigeon pose helps to realign the spine. It counteracts the effects of prolonged sitting, which often leads to a rounded back and tight hip flexors. This improved alignment can alleviate back pain and contribute to better overall posture.
Enhanced Athletic Performance
Athletes across various disciplines, from runners to weightlifters, can benefit from the increased hip mobility and flexibility offered by pigeon pose yoga. Greater hip range of motion translates to more efficient movement patterns, reduced risk of muscle strains, and improved power generation.
Pigeon Pose Variations: From Beginner to Advanced
Reclined Pigeon (Supta Eka Pada Rajakapotasana)
For those finding traditional Pigeon Pose challenging, Reclined Pigeon offers a gentler entry. Lie on your back and cross your right ankle over your left thigh, just above the knee. Flex your right foot to protect your ankle. You can stay here, or gently draw your left thigh towards your chest for a deeper stretch. Using a yoga strap around your left thigh can help bring your leg closer if needed. This variation is excellent for improving hip mobility, a benefit supported by numerous PubMed studies on hip mobility and yoga efficacy PubMed.
Sleeping Pigeon
Sleeping Pigeon is a restorative variation that emphasizes relaxation. From Reclined Pigeon, keep your legs in the crossed position but rest your sacrum on the floor. You can place a bolster or folded blanket under your hips for support. This gentle inversion allows the hips to open passively, promoting deep relaxation. It’s a wonderful way to wind down after a more active practice or a stressful day; for similar calming effects, explore our guide on best yoga poses for stress relief.
Flying Pigeon (Eka Pada Galavasana)
An advanced variation, Flying Pigeon, requires significant core strength and balance. It’s essentially an arm balance where you perch your bent leg on your triceps and extend the other leg forward or up. This pose demands a high level of flexibility and preparation, often building upon the hip opening achieved in traditional Pigeon Pose.
Progression Guide for Building Depth
To gradually deepen your Pigeon Pose practice, start with Reclined Pigeon. As your flexibility increases, transition to the traditional Pigeon Pose on the floor. Once comfortable there, you can explore variations like King Pigeon (using a strap to bind the back foot) or work towards the arm balance of Flying Pigeon. Consistency is key; incorporating props like yoga blocks under your hip or a bolster for support can make the pose more accessible at any stage. For those seeking to enhance their practice with quality equipment, exploring options from reputable retailers like can be beneficial.
Common Mistakes and How to Avoid Them
Even experienced practitioners make form errors in pigeon pose that can strain joints or limit the pose’s effectiveness. Knowing what to watch for protects you and deepens your practice.
Collapsing the Front Knee Inward
When the front shin isn’t supported, the knee can torque inward, placing dangerous stress on the joint. Keep your front foot flexed and ensure the shin angles across the mat — even a small flex activates protective muscles around the knee.
Rounding the Lower Back
Slumping through the lumbar spine compresses the discs and reduces hip-opening benefits. Lengthen your tailbone toward the floor and lift through the crown of your head before folding forward. If rounding persists, place a folded blanket under your front hip for elevation.
Forcing Depth Too Quickly
WebMD on yoga contraindications and medical considerations Harvard Health cautions that pushing aggressively into poses with pre-existing joint issues can worsen injury. Progress gradually — discomfort should feel like a stretch, never a sharp or pinching sensation. If pigeon aggravates sciatic nerve pain, our guide on yoga for sciatica offers safer modifications.
Ignoring Hip Asymmetry
Most people have one hip significantly tighter than the other. Spend extra time on your restricted side and use props consistently rather than forcing symmetry. Asymmetry is normal — working with it, not against it, is smart practice.
Troubleshooting Pain and Discomfort in Pigeon Pose
Knee Pain: Causes and Modifications
Knee discomfort in Pigeon Pose often stems from the front shin being too far forward or angled incorrectly. Ensure your front shin is as close to perpendicular to your front thigh as possible, or even angled slightly inward. If pain persists, place a folded blanket or block under the knee of your front leg for support. Avoid forcing the pose if you feel sharp pain.
Lower Back Strain: Alignment Fixes
A common culprit for lower back strain is an excessive anterior pelvic tilt, meaning your tailbone is tucked under and your lower back is hyperextended. To correct this, gently draw your lower abdominal muscles in and up, and imagine lengthening your tailbone towards the floor. Keep your hips level; a block or blanket under the hip of the bent-leg side can help if one hip is significantly higher than the other.
Why One Side Is Harder Than the Other
It’s completely normal for one side to feel tighter or more challenging. This asymmetry often reflects habitual movement patterns and muscle imbalances. Be patient and avoid pushing harder on the tighter side. Work with what you feel, and focus on breath and alignment rather than achieving symmetry. Over time, consistent practice can help balance these differences.
Tight Hamstrings: Preparatory Poses
If your hamstrings are very tight, you might struggle to bring your front shin parallel to the mat. Instead of forcing it, try preparatory poses like Reclining Hand-to-Big-Toe Pose or Uttanasana (Standing Forward Bend) to gently stretch the hamstrings. You can also keep your front shin angled more sharply towards your groin in Pigeon Pose, bringing your foot closer to your hip. Using a strap around your front foot can also assist in lifting the leg.
Pigeon Pose in Different Yoga Styles
Pigeon Pose in Different Yoga Styles
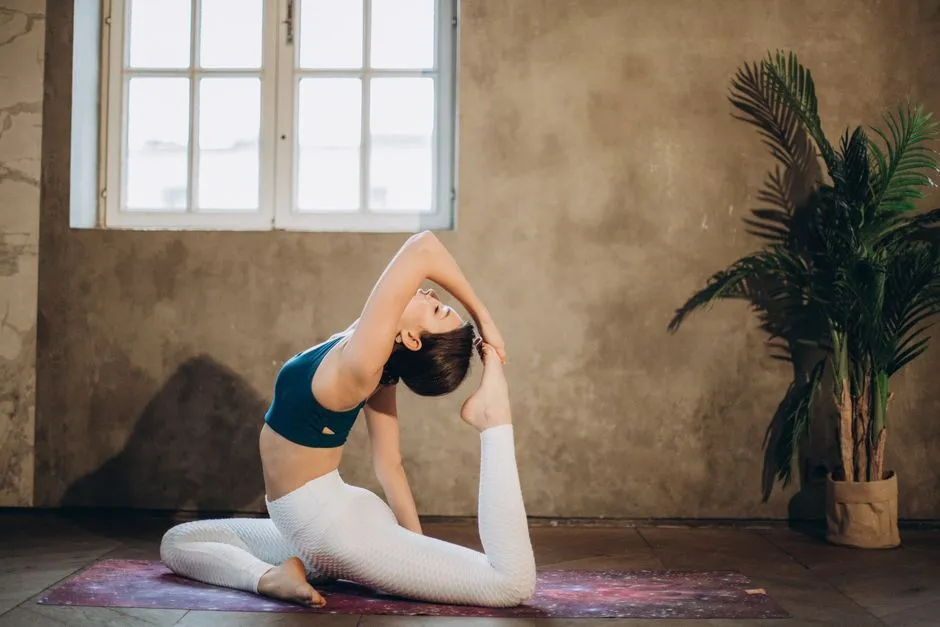
Pigeon pose yoga, or Eka Pada Rajakapotasana, is a versatile posture that appears in various yoga traditions, though its execution and intention may differ. Many find it particularly helpful for relieving tension, a benefit also seen in yoga poses for stress relief.
Vinyasa Flow Integration
In vinyasa or power yoga, pigeon pose often serves as a peak pose or a transitional element within a dynamic sequence. It’s typically held for a shorter duration, focusing on building heat and strength while flowing into and out of other poses. To explore this dynamic approach, consider an for guided instruction.
Yin Yoga Approach
Yin yoga offers a contrasting perspective. Here, pigeon pose is held passively for several minutes, targeting the deep connective tissues like fascia and ligaments. This sustained compression and stretch aim to increase joint mobility and release deep-seated tension. This approach can be particularly beneficial for those experiencing tightness, similar to how certain poses can help with yoga for sciatica.
Restorative Yoga Modifications
In restorative yoga, the emphasis is on deep relaxation and healing. Pigeon pose is heavily supported with props like bolsters, blankets, and blocks, allowing the body to release effort completely. The goal is not stretching but gentle opening and profound rest, often incorporating breathwork for enhanced calm.
Contraindications and When to Avoid Pigeon Pose
Pigeon pose offers significant benefits, but it isn’t appropriate for everyone. Recognizing when to skip or modify it is essential for practicing safely and responsibly.
Hip or Knee Injuries
Pigeon pose places considerable rotational stress on the hip joint and compressive force on the bent front knee. If you have an active hip labral tear, bursitis, IT band syndrome, or any acute knee injury, this pose can aggravate the condition. Those recovering from hip replacement surgery should avoid it entirely until cleared by their surgeon. When sciatica is involved, the pose may either help or worsen symptoms depending on the underlying cause — consult a healthcare provider first, and explore our guide on yoga for sciatica for safer alternatives.
Lower Back Conditions
A compressed lumbar spine or herniated disc can be further irritated if the pelvis tilts unevenly in pigeon pose. Always prioritize a level, supported pelvis over depth, and avoid the pose during acute lower back flare-ups.
Pregnancy Considerations
Deep hip openers can be appropriate during pregnancy, but the prone (lying-forward) variation should be avoided as the belly grows. Opt for a supported, upright version with a bolster, and always seek guidance from a qualified prenatal yoga instructor or midwife before continuing.
Pigeon Pose vs. Similar Hip-Opening Poses
Pigeon Pose vs. Cow Face Pose
Both poses target the external hip rotators, but Cow Face Pose (Gomukhasana) works both hips simultaneously in a seated position, making it easier to compare flexibility side to side. Pigeon Pose, however, allows a deeper, more isolated stretch in the front hip — and its prone position naturally encourages a forward-fold release that Cow Face cannot replicate.
Pigeon Pose vs. Figure Four Stretch
The Figure Four (supine Pigeon) is the most accessible alternative, performed lying on your back with no weight through the hip joint. It delivers a very similar piriformis and glute stretch with far less strain — making it the smarter choice for anyone with knee sensitivity or acute hip pain. If sciatic nerve irritation is a concern, this gentler option is often recommended first; see our guide on yoga for sciatica for targeted advice.
Choosing the Right Pose for Your Goals
Choose Pigeon Pose for deep hip opening and emotional release. Choose Figure Four when managing pain or building foundational flexibility. Choose Cow Face to address hip asymmetry methodically. No single pose is superior — the best choice is the one your body can access safely and consistently.
About the Author

Pratham Bavkar — Wellness Researcher · Founder, Yoga Therapy Guide
Pratham Bavkar is the founder of Yoga Therapy Guide and a wellness researcher focused on yoga therapy, mobility, and posture health. He creates evidence-based, beginner-friendly guides on yoga poses, stretching routines, and natural wellness practices to help readers improve daily health naturally.